Utilizing Cloudflare 🚀
Upgrade Your Website Performance and Security to the Next Level! 👨💻
Hello there! Today, I’ll be sharing detailed methods for utilizing Cloudflare, an essential tool for website operations. We’ll cover everything from connecting your domain to setting up DDNS and managing SSL certificates, explaining each process step by step. 🌐
1️⃣ Connecting Your Domain to Cloudflare 🔗
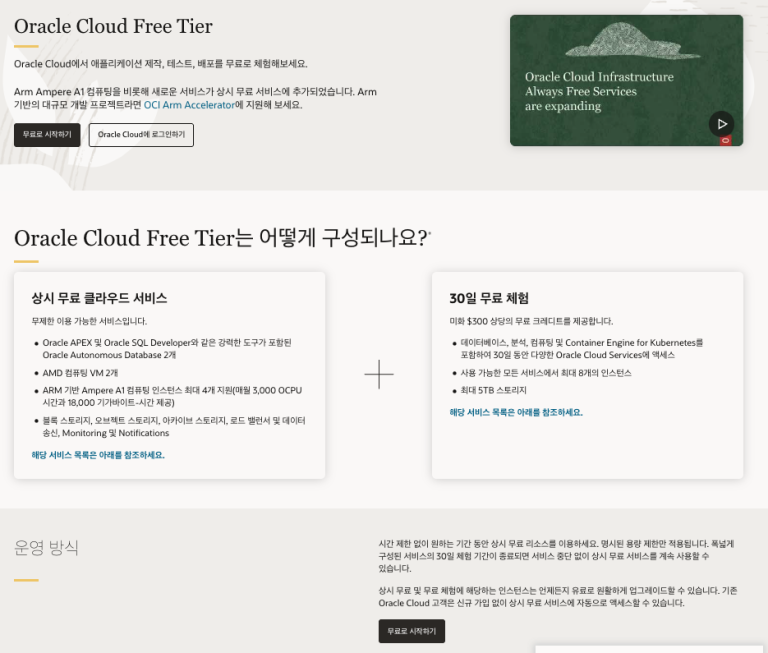
Cloudflare is a free CDN service and DNS management tool that can significantly improve your website’s speed and security. Let’s learn how to connect your domain.
📝 Step-by-Step Guide
Step 1: Create an Account and Login 📲
- Visit the Cloudflare website.
- Click the “Sign Up” button to create an account or login with your existing account.

Step 2: Add Your Domain ➕
- Click the “Add a Site” button on your dashboard.
- Enter the domain you want to connect (e.g.,
example.com) and click “Add Site”.
💡 TIP: You should enter the root domain, not a subdomain.
Example) Correct: example.com | Incorrect: blog.example.com
Step 3: Select a Plan 💰
- Choose between the free plan or other paid plans.
- The free plan is sufficient for most personal websites.
- Click the “Continue” button.
Step 4: Verify DNS Records ✅
- Cloudflare will automatically scan and import your existing DNS records.
- Verify that all records have been imported correctly.
- Examples: A records, CNAME records, MX records, etc.
Real-World Example:
Type    Name             Content            TTL       Proxy status
A       @                203.0.113.50       Auto      Proxied
CNAME   www              example.com        Auto      Proxied
MX      @                mail.example.com   Auto      DNS only
TXT     @                v=spf1 -all        Auto      DNS only
Add or modify records if necessary:
- If you have a blog server, add an A record:
blog 203.0.113.51 Auto Proxied - For an email server, add an MX record:
@ 10 mail.example.com Auto DNS only
Step 5: Change Nameservers 🔄
Note down the nameserver information provided by Cloudflare.
Example:
ns1.cloudflare.com ns2.cloudflare.comLogin to your domain registrar’s management panel (e.g., GoDaddy, Namecheap, etc.)
Navigate to the nameserver settings menu.
Change the existing nameservers to those provided by Cloudflare.
Example (for GoDaddy):
- Login to GoDaddy → Domain Management → Nameservers
- Select “I’ll use my own nameservers”
- Enter Cloudflare nameservers:
ns1.cloudflare.comns2.cloudflare.com - Save changes
Step 6: Verify Nameserver Change and Activation 🟢
- Nameserver changes can take up to 24 hours to propagate (usually completes within a few hours).
- Check the status on your Cloudflare dashboard.
- When you see “Status: Active”, your domain has been successfully connected!
Now your website is being served through Cloudflare, and you can enjoy benefits like:
- 🚀 Accelerated content delivery
- 🛡️ DDoS attack protection
- 💻 Reduced server load through caching
- 🔒 Free SSL certificate
2️⃣ Setting Up DDNS with ddclient 🔄
When running a server at home or in an office with a dynamic IP address, DDNS (Dynamic DNS) is essential. Let’s explore how to set up DDNS using Cloudflare and ddclient.
📝 Step-by-Step Guide
Step 1: Prerequisites 📋
- Your domain should already be connected to Cloudflare.
- You need access to a Linux/Unix-based system (Raspberry Pi, Ubuntu server, etc.)
Step 2: Generate a Cloudflare API Token 🔑
- Login to your Cloudflare account.
- Click on your profile icon in the top-right corner → “My Profile”
- Select “API Tokens” from the left menu
- Click the “Create Token” button
- Select the “Edit zone DNS” template or create a custom token
- Set permissions:
- Zone Resources: Specific domain or all domains
- Permissions: Zone – DNS – Edit
- Click “Continue to summary” then “Create Token”
- Copy and save the generated token in a secure location.
💡 TIP: API tokens are only displayed once. Make sure to save it securely!
Step 3: Install ddclient 🖥️
You can install it via package managers on various Linux distributions:
Ubuntu/Debian:
sudo apt-get update
sudo apt-get install ddclient
CentOS/RHEL:
sudo yum install ddclient
Raspberry Pi (Raspberry Pi OS):
sudo apt update
sudo apt install ddclient
Step 4: Configure ddclient ⚙️
- Open the configuration file:
sudo nano /etc/ddclient.conf
- Modify the file with the following content:
# Basic configuration
daemon=300
use=web
web=checkip.dyndns.org
web-skip='IP Address'
# Cloudflare configuration
protocol=cloudflare
zone=yourdomain.com
login=your-cloudflare-email
password=your-api-token
ttl=1
home.yourdomain.com
Where:
yourdomain.com→ Your domain (e.g., example.com)your-cloudflare-email→ Your Cloudflare account emailyour-api-token→ API token created in Step 2home.yourdomain.com→ Subdomain to update (e.g., home.example.com)
Real-World Example:
daemon=300
use=web
web=checkip.dyndns.org
web-skip='IP Address'

protocol=cloudflare
zone=example.com
[email protected]
password=0123456789abcdef0123456789abcdef
ttl=1
home.example.com
nas.example.com
In this example, we’re updating two subdomains simultaneously: home.example.com and nas.example.com.
Step 5: Start ddclient Service and Set Automatic Startup ▶️
# Start the service
sudo systemctl start ddclient
# Set to start automatically on boot
sudo systemctl enable ddclient
# Check status
sudo systemctl status ddclient
If running correctly, you should see output like this:
● ddclient.service - Dynamic DNS Update Client
Loaded: loaded (/lib/systemd/system/ddclient.service; enabled; vendor preset: enabled)
Active: active (running) since Sat 2023-04-15 14:30:12 UTC; 5s ago
Main PID: 12345 (ddclient)
Tasks: 1 (limit: 4915)
Memory: 4.8M
CGroup: /system.slice/ddclient.service
└─12345 /usr/sbin/ddclient -daemon 300
Step 6: Manual Testing 🧪
Run a manual update to confirm your settings are working correctly:
sudo ddclient -verbose -debug -force
If successful, you’ll see a message like:
SUCCESS: updating home.example.com: IP address set to 203.0.113.100
Step 7: Verification ✅
- Check the DNS settings in your Cloudflare dashboard.
- Verify that the A record for
home.yourdomain.com(or your configured subdomain) has been updated to your current IP address.
Now your DNS record will automatically update whenever your IP address changes!
Use Cases:
- 🏠 Home servers (e.g., media servers, NAS)
- 💻 Personal cloud (e.g., Nextcloud)
- 🎮 Game servers
- 📹 Home CCTV systems
- 🌐 Personal VPN servers
3️⃣ Using Certbot with Cloudflare 🔒
Let’s explore how to use Certbot with Cloudflare to obtain free SSL certificates from Let’s Encrypt.
📝 Step-by-Step Guide
Step 1: Temporarily Disable Cloudflare Proxy for Certbot 🔌
Let’s Encrypt needs to access your server directly to verify domain ownership. Therefore, you need to temporarily disable the Cloudflare proxy before obtaining the certificate.
- Login to Cloudflare dashboard → Select your domain
- Go to the “DNS” tab
- Find the A record for the domain/subdomain you want to get a certificate for
- Click the orange cloud icon (Proxied) to change it to a gray cloud (DNS only)
Example:
Type  Name     Content        TTL    Status
A     @        203.0.113.50   Auto   📡 DNS only (was 🌥️ Proxied)
A     www      203.0.113.50   Auto   📡 DNS only (was 🌥️ Proxied)
- Wait about 5-10 minutes for the changes to take effect.
Step 2: Obtain SSL Certificate with Certbot 📜
- Install Certbot on your server (if not already installed)
Ubuntu/Debian:
sudo apt update
sudo apt install certbot
CentOS:
sudo yum install certbot
- Install the appropriate plugin for your web server (Apache or Nginx)
Apache:
sudo apt install python3-certbot-apache
Nginx:
sudo apt install python3-certbot-nginx
- Obtain the SSL certificate
For Apache:
sudo certbot --apache -d example.com -d www.example.com
For Nginx:
sudo certbot --nginx -d example.com -d www.example.com
For standalone mode (if you don’t have a web server or use a different one):
sudo certbot certonly --standalone -d example.com -d www.example.com
- Follow the on-screen instructions to enter your email address and agree to the terms.
- When the certificate issuance is complete, you’ll see a success message.
 - Congratulations! Your certificate and chain have been saved at:
   /etc/letsencrypt/live/example.com/fullchain.pem
   Your key file has been saved at:
   /etc/letsencrypt/live/example.com/privkey.pem
Step 3: Re-enable Cloudflare Proxy 🔌
- Return to your Cloudflare dashboard.
- In the “DNS” tab, find the A record for your domain.
- Click the gray cloud icon (DNS only) to change it back to an orange cloud (Proxied).
Type  Name     Content        TTL    Status
A     @        203.0.113.50   Auto   🌥️ Proxied (was 📡 DNS only)
A     www      203.0.113.50   Auto   🌥️ Proxied (was 📡 DNS only)
Step 4: Change Cloudflare SSL Setting from “Flexible” to “Full (Strict)” 🔐
- Go to the “SSL/TLS” tab in your Cloudflare dashboard.
- Check the current SSL mode in the “Overview” section.
- Select the “Full (Strict)” option.

- Click the “Save” button to apply the changes.
SSL Mode Descriptions:
- Flexible: Cloudflare provides HTTPS to visitors but allows HTTP or invalid SSL certificates between Cloudflare and your origin server.
- Full: Requires encrypted connection between Cloudflare and your origin server but allows self-signed certificates.
- Full (Strict): Requires a valid, trusted SSL certificate between Cloudflare and your origin server.
“Full (Strict)” mode provides the highest level of security and helps prevent man-in-the-middle attacks.
Step 5: Set Up Automatic Certificate Renewal 🔄
Let’s Encrypt certificates must be renewed every 90 days. Here’s how to set up automatic renewal:
- Check the Cron job status:
sudo systemctl status certbot.timer
- If not active:
sudo systemctl enable certbot.timer
sudo systemctl start certbot.timer
- Test renewal:
sudo certbot renew --dry-run
Automating Cloudflare Proxy Settings During Renewal:
To automatically disable and re-enable the Cloudflare proxy during certificate renewal, you can create a script:
- Generate a Cloudflare API token (same as in the DDNS setup section)
- Create a script file with the following content:
sudo nano /usr/local/bin/certbot-cloudflare.sh
#!/bin/bash

# Cloudflare API settings
EMAIL="your-cloudflare-email"
API_KEY="your-global-api-key"
ZONE_ID="your-zone-id"
DOMAIN="example.com"
RECORD_ID="your-dns-record-id"

# Turn off DNS record proxy
echo "Turning off Cloudflare proxy..."
curl -X PATCH "https://api.cloudflare.com/client/v4/zones/$ZONE_ID/dns_records/$RECORD_ID" \
     -H "X-Auth-Email: $EMAIL" \
     -H "X-Auth-Key: $API_KEY" \
     -H "Content-Type: application/json" \
     --data '{"proxied":false}'

# Wait for DNS changes to propagate
echo "Waiting for DNS changes to propagate..."
sleep 60

# Run Certbot renewal
echo "Renewing certificates..."
certbot renew

# Turn DNS record proxy back on
echo "Turning Cloudflare proxy back on..."
curl -X PATCH "https://api.cloudflare.com/client/v4/zones/$ZONE_ID/dns_records/$RECORD_ID" \
     -H "X-Auth-Email: $EMAIL" \
     -H "X-Auth-Key: $API_KEY" \
     -H "Content-Type: application/json" \
     --data '{"proxied":true}'

echo "Done!"
- Make the script executable:
sudo chmod +x /usr/local/bin/certbot-cloudflare.sh
- Set up an automatic renewal task:
sudo crontab -e
- Add the following line (runs at 3 AM on the 1st of every month):
0 3 1 * * /usr/local/bin/certbot-cloudflare.sh
Now your certificate renewal process is fully automated! 🎉
🌟 Real-World Use Cases
Personal Blog 📝
- Domain: blog.example.com
- WordPress installation
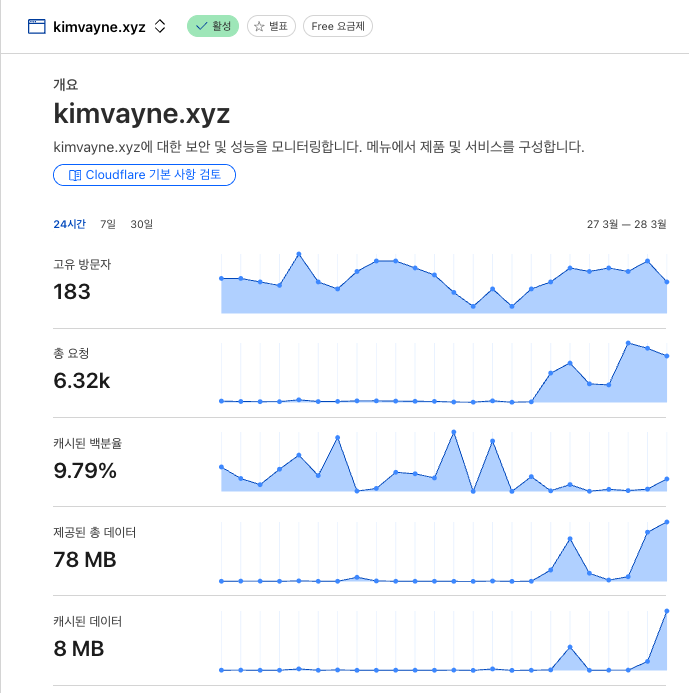
- Caching and visitor analytics with Cloudflare
- SSL certificate via Let’s Encrypt
Personal Cloud Server ☁️
- Domain: cloud.example.com
- Nextcloud or Owncloud installation
- Reliable access to a home-hosted server via DDNS
- Enhanced data security with SSL certificates
Media Streaming Server 🎬
- Domain: media.example.com
- Plex or Emby installation
- External access via DDNS
- Enhanced security with Cloudflare
📚 Conclusion
By utilizing Cloudflare, you can effectively solve various issues such as domain management, dynamic IP problems, and SSL certificate management. By using the three main features explained in this blog together, you can operate professional web services for free or at a low cost.
If you have any questions or need additional information, please leave a comment below! 😊
References: