
🌍 MikroTik에서 국가별 IP 차단하기: 완벽 가이드 🛡️
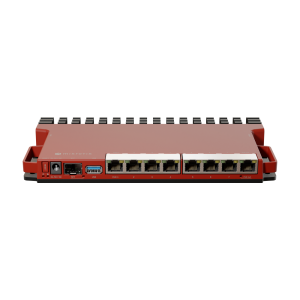
안녕하세요! 👋 오늘은 MikroTik(L009UiGS-RM) 라우터에서 특정 국가의 IP 주소를 차단하는 방법에 대해 알아보겠습니다. 🔒 국가별 IP 차단은 보안을 강화하고 원치 않는 트래픽을 필터링하는 효과적인 방법입니다. 🚫
🧰 준비물
- 🔄 MikroTik 라우터
- 💻 Winbox 접속 프로그램
- 📋 IP2LOCATION에서 다운로드한 국가별 IP 목록
1. 📥 IP2LOCATION에서 국가별 IP 목록 다운로드하기
최신 IP 목록을 얻기 위해 IP2LOCATION을 사용하는 것이 좋습니다. 🌟 다음 단계를 따라하세요:
- 🌐 IP2LOCATION 웹사이트에 접속합니다.
- 🚩 차단하고자 하는 국가(Country)를 선택합니다.
- 🔽 Output Format에서 MikroTik을 선택합니다.
- 💾 파일을 다운로드하고 압축을 해제합니다.
2. ✏️ 다운로드한 파일 수정하기
IP2LOCATION에서 받은 파일은 그대로 임포트할 경우 “bad command name add (line 8 column 1)” 에러가 발생합니다. ⚠️ 파일을 수정해야 합니다:
- 🔓 압축을 푼 후
firewall.txt파일을 텍스트 편집기로 엽니다. - ➕ 파일 상단의 주석 다음에 다음 한 줄을 추가합니다:
/ip firewall address-list - 💾 파일을 저장합니다.
이 작업은 MikroTik이 파일을 올바르게 해석할 수 있도록 해줍니다. 🔧
3. 📤 수정된 IP 목록을 MikroTik에 업로드하기
이제 수정한 파일을 MikroTik 라우터에 업로드해야 합니다: 🚀
- 🖥️ Winbox를 실행하고 라우터에 연결합니다.
- 📁 왼쪽 메뉴에서 Files를 클릭하여 파일 창을 엽니다.
- 🖱️ 수정한 IP 목록 파일을 File List 창으로 드래그 & 드롭하여 업로드합니다.
- ⬆️ 드래그 & 드롭으로 업로드가 안 된다면 Upload 버튼을 클릭하여 파일을 업로드합니다.
4. 📥 업로드한 목록을 Address Lists에 임포트하기
이제 업로드한 파일을 MikroTik의 주소 목록에 임포트해야 합니다: 📋
💻 Winbox에서 New Terminal을 클릭하여 터미널 창을 엽니다.
⌨️ 다음 명령어를 입력합니다:
import "파일명"예시:
import IP-Firewall-Address-List.rsc✅ 임포트가 완료되면 IP > Firewall > Address Lists에서 IP 주소 목록이 추가된 것을 확인할 수 있습니다.
5. 🔥 방화벽 규칙 생성하기
이제 임포트한 IP 주소 목록을 사용하여 방화벽 규칙을 설정합니다: 🛡️
- 📋 Address Lists를 확인해보면, Name 열에 “CountryIPBlocks“라고 표시된 항목들을 볼 수 있습니다.
- 🔄 Firewall > Filter Rules 탭으로 이동합니다.
- ➕ + 버튼을 클릭하여 새 규칙 설정 창을 엽니다.
- ⚙️ General 탭에서:
- 🔗 Chain을 forward로 설정합니다.
- 📝 Src. Address List 드롭다운 메뉴를 클릭하고, 임포트한 목록 이름(“CountryIPBlocks”)을 선택합니다.
- 🎯 Action 탭으로 이동하여:
- 🚫 Action을 Drop으로 설정합니다.
- 📊 로그 기록을 위해 (선택사항):
- 📝 Log를 선택합니다.
- 🏷️ Log Prefix에 원하는 텍스트를 입력합니다 (예: “국가IP차단”).
- ✅ OK를 클릭하여 규칙을 저장합니다.
6. 📊 로그 확인하기
설정한 방화벽 규칙이 제대로 작동하는지 확인하려면: 🔍
- 📋 Log 메뉴로 이동합니다.
- 🔎 설정한 Log Prefix가 포함된 항목들을 확인합니다.
🎉 마치며
이제 MikroTik 라우터에서 특정 국가의 IP 주소를 성공적으로 차단하셨습니다! 🎊 이 방법은 네트워크 보안을 강화하고, 특정 지역에서 오는 악의적인 트래픽을 차단하는 데 매우 효과적입니다. 🛡️
⚠️ 주의할 점은 IP 목록은 정기적으로 업데이트되므로, 최신 상태를 유지하기 위해 주기적으로 이 과정을 반복하는 것이 좋습니다. 🔄
혹시 추가 질문이나 문제가 있으시면 댓글로 남겨주세요! 👇 감사합니다! 😊
🌍 Blocking IPs by Country in MikroTik: Complete Guide 🛡️
Hello everyone! 👋 Today I’ll show you how to block IP addresses from specific countries using a MikroTik(L009UiGS-RM) router. 🔒 Country-based IP blocking is an effective way to enhance security and filter unwanted traffic from your network. 🚫
🧰 Prerequisites
- 🔄 A MikroTik router
- 💻 Winbox connection program
- 📋 Country-specific IP lists from IP2LOCATION
1. 📥 Download Country IP Lists from IP2LOCATION
For the most current IP lists, IP2LOCATION is highly recommended. 🌟 Follow these steps:
- 🌐 Visit the IP2LOCATION website.
- 🚩 Select the country (or countries) you want to block.
- 🔽 Choose MikroTik as the Output Format.
- 💾 Download the file and extract it from the archive.
2. ✏️ Modify the Downloaded File
The file from IP2LOCATION needs a small modification before importing, or you’ll encounter a “bad command name add (line 8 column 1)” error: ⚠️
- 🔓 Open the extracted
firewall.txtfile with any text editor. - ➕ Add the following line after the comments at the top of the file:
/ip firewall address-list - 💾 Save the file.
This modification ensures that MikroTik correctly interprets the file during import. 🔧
3. 📤 Upload the Modified IP List to MikroTik
Now you need to upload the modified file to your MikroTik router: 🚀
- 🖥️ Launch Winbox and connect to your router.
- 📁 Click on Files in the left menu to open the file window.
- 🖱️ Drag & drop your modified IP list file into the File List window.
- ⬆️ If drag & drop doesn’t work, click the Upload button to upload the file.
4. 📥 Import the Uploaded List to Address Lists
Now you need to import the uploaded file into MikroTik’s address lists: 📋
💻 Click on New Terminal in Winbox to open a terminal window.
⌨️ Enter the following command:
import "filename"Example:
import IP-Firewall-Address-List.rsc✅ Once the import is complete, you can verify that the IP addresses have been added by checking IP > Firewall > Address Lists.
5. 🔥 Create Firewall Rules
Now let’s set up firewall rules using the imported IP address list: 🛡️
- 📋 In the Address Lists, you’ll see entries with “CountryIPBlocks” in the Name column.
- 🔄 Go to the Firewall > Filter Rules tab.
- ➕ Click the + button to open a new rule configuration window.
- ⚙️ In the General tab:
- 🔗 Set Chain to forward.
- 📝 Click the dropdown menu for Src. Address List and select the imported list name (“CountryIPBlocks”).
- 🎯 Move to the Action tab:
- 🚫 Set Action to Drop.
- 📊 For logging (optional):
- 📝 Select Log.
- 🏷️ Enter a desired text in Log Prefix (e.g., “CountryIPBlock”).
- ✅ Click OK to save the rule.
6. 📊 Check the Logs
To verify that your firewall rule is working properly: 🔍
- 📋 Go to the Log menu.
- 🔎 Look for entries containing the Log Prefix you configured.
🎉 Conclusion
You have successfully configured your MikroTik router to block IP addresses from specific countries! 🎊 This method is very effective for enhancing network security and blocking malicious traffic from certain regions. 🛡️
⚠️ Keep in mind that IP lists are updated regularly, so it’s a good practice to repeat this process periodically to maintain the most current blocking rules. 🔄
If you have any questions or issues, please feel free to leave a comment below! 👇 Thank you! 😊