
🚀 Vagrant로 물뮤 프로젝트 쿠버네티스 클러스터 구축하기
안녕하세요, 개발자 여러분! 오늘은 제가 맥미니에서 Vagrant를 사용해 물뮤(MoolMeow) 프로젝트를 위한 쿠버네티스 클러스터를 구축한 과정을 공유하려고 합니다. 🐱 많은 시행착오가 있었지만, 결국 성공적으로 구축했답니다! 함께 살펴볼까요?
🤔 Vagrant란 무엇인가요?
Vagrant는 가상 개발 환경을 구축하고 관리하기 위한 도구입니다. 코드로 인프라를 정의하는 방식(IaC)으로, 개발자가 VM을 쉽게 생성하고 구성할 수 있게 해줍니다. Vagrantfile 하나로 어디서든 동일한 환경을 만들 수 있어요! 👨💻
Vagrant.configure("2") do |config|
  config.vm.box = "ubuntu/focal64"
end
이렇게 간단한 설정으로 Ubuntu 가상 머신을 생성할 수 있답니다!
🛠️ 환경 준비하기
물뮤 프로젝트를 위해 필요했던 것들은 다음과 같아요:
- Mac Mini (M2 칩)
- VMware Fusion (Apple Silicon 지원)
- Vagrant + Vagrant VMware 플러그인
- k3s (경량 쿠버네티스)
🚀 Building a Kubernetes Cluster for the MoolMeow Project with Vagrant
Hello fellow developers! Today I’d like to share my journey of setting up a Kubernetes cluster for the MoolMeow project on a Mac Mini using Vagrant. 🐱 There were quite a few challenges along the way, but I finally got it working! Let’s dive in, shall we?
🤔 What is Vagrant?
Vagrant is a tool for building and managing virtual development environments. It follows the Infrastructure as Code (IaC) approach, allowing developers to create and configure VMs easily. With just one Vagrantfile, you can create identical environments anywhere! 👨💻
Vagrant.configure("2") do |config|
  config.vm.box = "ubuntu/focal64"
end
With this simple configuration, you can create an Ubuntu virtual machine!
🛠️ Setting Up the Environment
For the MoolMeow project, I needed the following:
- Mac Mini (with M2 chip)
- VMware Fusion (with Apple Silicon support)
- Vagrant + Vagrant VMware plugin
- k3s (lightweight Kubernetes)
😅 문제와 해결 과정
1. 아키텍처 호환성 문제 🏗️
문제: Apple Silicon Mac에서 x86 VM이 실행되지 않았어요.
This virtual machine cannot be powered on because it requires the X86 machine architecture
해결: ARM64 호환 박스를 찾아 사용했습니다!
config.vm.box = "gutehall/ubuntu24-04"
config.vm.box_version = "2025.02.20"
2. 서비스 연결 문제 🔌
문제: Vagrant VMware Utility와의 연결이 되지 않았어요.
Vagrant encountered an error while attempting to load the utility service key file
해결: 서비스를 재시작했습니다.
sudo launchctl unload /Library/LaunchDaemons/com.vagrant.vagrant-vmware-utility.plist
sudo launchctl load -w /Library/LaunchDaemons/com.vagrant.vagrant-vmware-utility.plist
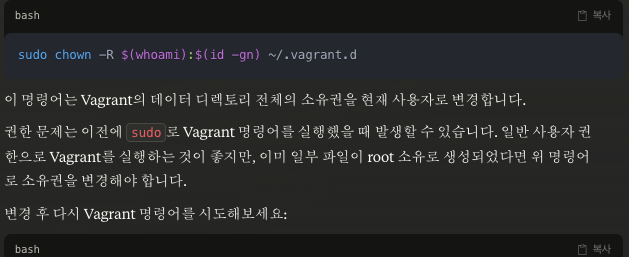
3. 권한 문제 🔒
문제: VM 파일 접근 권한이 없었어요.
Permission denied @ rb_sysopen
해결: 디렉토리 소유권을 변경했습니다.
sudo chown -R $(whoami) ~/.vagrant.d/
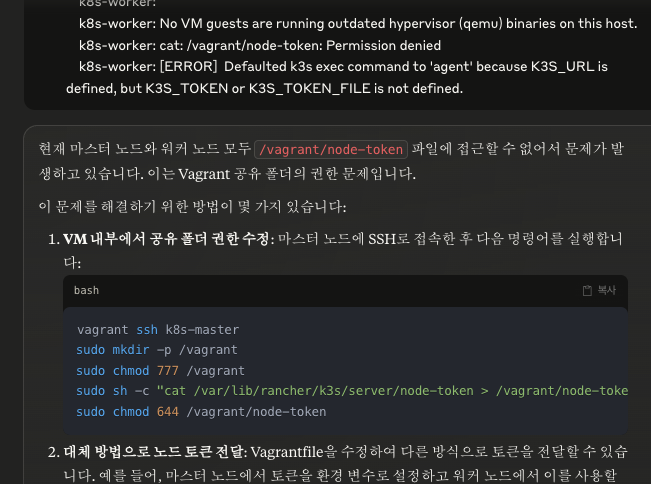
4. 노드 간 통신 문제 🤝
문제: 쿠버네티스 마스터-워커 노드 연결이 안 됐어요.
cp: cannot create regular file '/vagrant/node-token': Permission denied
해결: 토큰을 직접 복사해서 사용했습니다.
- 마스터 노드에서 토큰 확인
- 워커 노드에서 토큰 값 직접 사용
😅 Challenges and Solutions
1. Architecture Compatibility Issues 🏗️
Problem: X86 VMs wouldn’t run on Apple Silicon Mac.
This virtual machine cannot be powered on because it requires the X86 machine architecture
Solution: Found and used an ARM64-compatible box!
config.vm.box = "gutehall/ubuntu24-04"
config.vm.box_version = "2025.02.20"
2. Service Connection Issues 🔌
Problem: Couldn’t connect to Vagrant VMware Utility.
Vagrant encountered an error while attempting to load the utility service key file
Solution: Restarted the service.
sudo launchctl unload /Library/LaunchDaemons/com.vagrant.vagrant-vmware-utility.plist
sudo launchctl load -w /Library/LaunchDaemons/com.vagrant.vagrant-vmware-utility.plist
3. Permission Issues 🔒
Problem: No access permissions for VM files.
Permission denied @ rb_sysopen
Solution: Changed directory ownership.
sudo chown -R $(whoami) ~/.vagrant.d/
4. Node Communication Issues 🤝
Problem: Kubernetes master-worker node connection failed.
cp: cannot create regular file '/vagrant/node-token': Permission denied
Solution: Used token directly.
- Retrieved token from master node
- Manually used token value on worker node
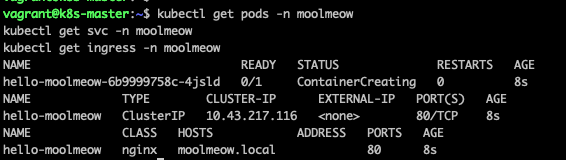
🎉 성공! 클러스터 구축 완료
드디어 성공했어요! 3개의 노드로 구성된 쿠버네티스 클러스터가 완성되었습니다:
- k8s-master: 컨트롤 플레인 (8GB RAM, 4 CPU)
- k8s-worker: 워커 노드 (4GB RAM, 2 CPU)
- k8s-setup: 설정용 VM (1GB RAM, 1 CPU)
kubectl get nodes
NAME         STATUS   ROLES                  AGE    VERSION
k8s-master   Ready    control-plane,master   10m    v1.28.6+k3s2
k8s-worker   Ready    <none>                 5m     v1.28.6+k3s2
💡 배운 점
이번 경험을 통해 많은 것을 배웠어요:
- ARM 아키텍처에서의 VM 호환성이 중요하다는 것
- 권한 관리의 중요성
- 문제 해결 시 단계적 접근이 효과적
- Vagrant의 공유 폴더 메커니즘 이해 필요
🚶♀️ 다음 단계
이제 다음 단계로 넘어갈 준비가 되었어요:
- Helm으로 Jenkins, ArgoCD, Prometheus, Grafana 설치
- 물뮤 애플리케이션 배포
- CI/CD 파이프라인 구축
🙏 마치며
Vagrant를 사용한 쿠버네티스 구축은 처음엔 어려웠지만, 문제를 하나씩 해결하면서 많이 배웠습니다. 특히 Apple Silicon 환경에서 작업할 때 발생하는 특수한 상황들을 이해하는 데 도움이 됐어요.
여러분도 도전해보세요! 질문이나 피드백이 있으시면 언제든 댓글로 남겨주세요. 감사합니다! 😊
🎉 Success! Cluster Up and Running
Finally, success! I built a Kubernetes cluster with three nodes:
- k8s-master: Control plane (8GB RAM, 4 CPU)
- k8s-worker: Worker node (4GB RAM, 2 CPU)
- k8s-setup: Setup VM (1GB RAM, 1 CPU)
kubectl get nodes
NAME         STATUS   ROLES                  AGE    VERSION
k8s-master   Ready    control-plane,master   10m    v1.28.6+k3s2
k8s-worker   Ready    <none>                 5m     v1.28.6+k3s2
💡 Lessons Learned
Through this experience, I learned many valuable lessons:
- VM compatibility on ARM architecture is crucial
- Proper permission management is essential
- Step-by-step troubleshooting is effective
- Understanding Vagrant’s shared folder mechanism is necessary
🚶♀️ Next Steps
Now I’m ready to move forward with:
- Installing Jenkins, ArgoCD, Prometheus, and Grafana using Helm
- Deploying the MoolMeow application
- Setting up CI/CD pipelines
🙏 Final Thoughts
Building a Kubernetes cluster with Vagrant was challenging at first, but I learned a lot by solving each problem one by one. It especially helped me understand the specific situations that arise when working in an Apple Silicon environment.
I encourage you to try it yourself! If you have any questions or feedback, please leave them in the comments. Thank you! 😊