VirtualBox + Vagrant로 온프레미스 쿠버네티스 환경 구축하기 🚀
안녕하세요! 오늘은 이전 글에서 언급했던 VMware 문제를 해결하기 위해 VirtualBox로 전환한 경험을 공유해 드리려고 합니다. VirtualBox와 Vagrant를 사용하여 물뮤(MoolMeow) 프로젝트를 위한 k3s 쿠버네티스 클러스터를 구축하는 방법을 알아보겠습니다! 😊
VirtualBox로 전환한 이유 🔄
VMware와 Vagrant 조합에서 계속되는 네트워크 문제로 인해 결국 VirtualBox로 전환하게 되었습니다. 특히 다음과 같은 장점이 있었습니다:
- 더 안정적인 네트워크 구성: 고정 IP가 재부팅 후에도 변경되지 않음
- 더 간단한 네트워크 설정 문법: VMware보다 훨씬 직관적인 설정 방식
- 더 나은 Vagrant 호환성: Vagrant가 기본적으로 VirtualBox를 우선 지원
VirtualBox용 Vagrantfile 작성하기 📝
VirtualBox를 위한 Vagrantfile은 VMware 버전보다 훨씬 간단합니다:
# -*- mode: ruby -*-
# vi: set ft=ruby :

    # 고정 IP 설정 - 훨씬 간단하죠!
    master.vm.network "private_network", ip: "192.168.56.10", netmask: "255.255.255.0"
보시다시피, VirtualBox의 네트워크 설정은 VMware보다 훨씬 간단합니다. 복잡한 MAC 주소 설정이나 vnet 지정 없이도 고정 IP 할당이 가능합니다.
Guest Additions 설치 문제 해결하기 🔧
VirtualBox를 사용하면서 마주친 가장 큰 문제는 “shared folder” 관련 오류였습니다:
Vagrant was unable to mount VirtualBox shared folders. This is usually
because the filesystem "vboxsf" is not available.
이 문제를 해결하기 위해 VM에 접속한 후 다음 명령어를 실행했습니다:
# 필요한 패키지 설치
sudo apt-get update
sudo apt-get install -y linux-headers-$(uname -r) build-essential dkms

# Guest Additions 재설치
sudo /opt/VBoxGuestAdditions-7.1.6/init/vboxadd setup
다행히 이 명령어로 Guest Additions가 정상적으로 설치되었고, VirtualBox의 공유 폴더 기능을 사용할 수 있게 되었습니다.
vboxadd-service.service가 활성화되었고 vboxsf 커널 모듈이 로드되어 있습니다. 이제 /vagrant 디렉토리를 통해 호스트 머신과 VM 간에 파일을 공유할 수 있습니다.
vagrant-vbguest 플러그인 사용하기 🔌
Guest Additions 문제를 더 간편하게 해결하기 위해 vagrant-vbguest 플러그인을 사용할 수도 있습니다:
# 플러그인 설치
vagrant plugin install vagrant-vbguest

# Vagrantfile에 다음 설정 추가
config.vbguest.auto_update = true
config.vbguest.no_remote = true
이 플러그인을 사용하면 VM 생성 시 자동으로 Guest Additions 설치를 시도합니다.
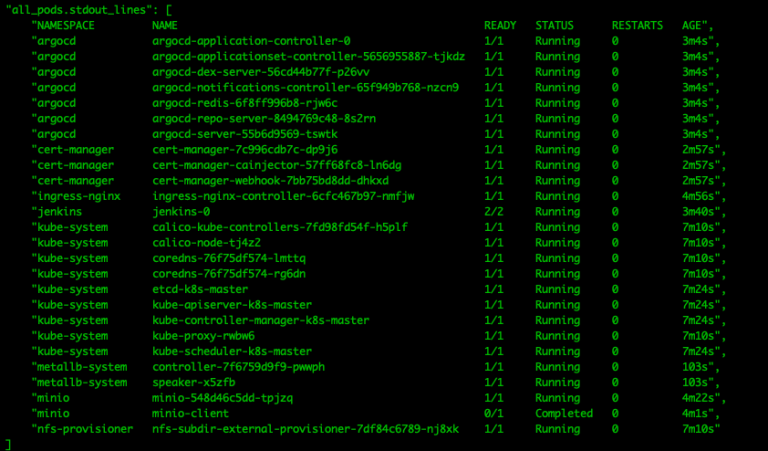
k3s 클러스터 구축 완료 및 확인 ✅
모든 VM이 정상적으로 시작되면, 마스터 노드에 접속하여 클러스터 상태를 확인할 수 있습니다:
$ vagrant ssh k8s-master
$ kubectl get nodes
NAME         STATUS   ROLES                  AGE    VERSION
k8s-master   Ready    control-plane,master   3m     v1.32.3+k3s1
k8s-worker   Ready    <none>                 2m     v1.32.3+k3s1
워커 노드가 마스터 노드에 성공적으로 조인된 것을 확인할 수 있습니다. 이제 기본적인 쿠버네티스 클러스터 구축이 완료되었습니다!
VirtualBox와 VMware 비교 🔄
이번 프로젝트를 통해 VirtualBox와 VMware를 비교해 볼 수 있었습니다:
| 기능 | VirtualBox | VMware |
|---|---|---|
| 네트워크 설정 | 간단하고 직관적 | 복잡하고 MAC 주소 기반 |
| 고정 IP 유지 | 매우 안정적 | 재부팅 후 변경되는 경우 있음 |
| Vagrant 호환성 | 매우 우수 | 일부 기능 제한 |
| 성능 | 다소 느림 | 더 빠름 |
| 공유 폴더 | Guest Additions 필요 | VMware Tools 필요 |
VirtualBox가 네트워크 설정 면에서는 더 간단하고 안정적이지만, 성능은 VMware가 조금 더 우수합니다. 하지만 온프레미스 환경에서 IaC를 구현한다면, 네트워크 안정성이 성능보다 더 중요한 경우가 많습니다.
결론: VirtualBox로 안정적인 온프레미스 IaC 구현 🎯
VMware에서 VirtualBox로 전환한 후, 네트워크 관련 문제가 거의 해결되었고 안정적인 온프레미스 쿠버네티스 환경을 구축할 수 있었습니다. 처음부터 VirtualBox를 사용했다면 많은 시간을 아꼈을 텐데요. 😅
물론 VirtualBox도 Guest Additions 설치 같은 작은 문제가 있었지만, 이는 커널 헤더 설치와 재설치로 쉽게 해결할 수 있었습니다. VMware의 네트워크 구성보다는 훨씬 간단했죠.
다음 글에서는 이렇게 구축한 k3s 클러스터에 필요한 구성 요소들(Calico, cert-manager, Vault 등)을 설치하는 방법에 대해 알아보겠습니다. 관심 있으신 분들은 계속 지켜봐 주세요! 👋
Building an On-Premises Kubernetes Environment with VirtualBox + Vagrant 🚀
Hello everyone! Today I want to share my experience with switching to VirtualBox after encountering the VMware issues I mentioned in my previous post. Let’s explore how to build a k3s Kubernetes cluster for the MoolMeow project using VirtualBox and Vagrant! 😊
Why I Switched to VirtualBox 🔄
After struggling with persistent network issues in the VMware and Vagrant combination, I finally switched to VirtualBox. The key advantages were:
- More reliable network configuration: Fixed IPs remain unchanged after reboots
- Simpler network setup syntax: Much more intuitive configuration than VMware
- Better Vagrant compatibility: Vagrant primarily supports VirtualBox by default
Creating a Vagrantfile for VirtualBox 📝
The Vagrantfile for VirtualBox is much simpler than the VMware version:
# -*- mode: ruby -*-
# vi: set ft=ruby :
    # Fixed IP setting - much simpler!
    master.vm.network "private_network", ip: "192.168.56.10", netmask: "255.255.255.0"
As you can see, the network configuration in VirtualBox is much simpler than in VMware. Fixed IP allocation is possible without complicated MAC address settings or vnet specification.
Solving the Guest Additions Installation Issue 🔧
The biggest issue I encountered with VirtualBox was the “shared folder” error:
Vagrant was unable to mount VirtualBox shared folders. This is usually
because the filesystem "vboxsf" is not available.
To solve this problem, I accessed the VM and ran the following commands:
# Install necessary packages
sudo apt-get update
sudo apt-get install -y linux-headers-$(uname -r) build-essential dkms

# Reinstall Guest Additions
sudo /opt/VBoxGuestAdditions-7.1.6/init/vboxadd setup
Fortunately, these commands successfully installed Guest Additions, enabling VirtualBox’s shared folder functionality.
vboxadd-service.service is active and the vboxsf kernel module is loaded. Now we can share files between the host machine and VM through the /vagrant directory.
Using the vagrant-vbguest Plugin 🔌
To solve Guest Additions problems more easily, you can use the vagrant-vbguest plugin:
# Install the plugin
vagrant plugin install vagrant-vbguest

# Add these settings to your Vagrantfile
config.vbguest.auto_update = true
config.vbguest.no_remote = true
This plugin will automatically attempt to install Guest Additions when creating VMs.
Completing and Verifying the k3s Cluster ✅
Once all VMs start normally, you can access the master node and check the cluster status:
$ vagrant ssh k8s-master
$ kubectl get nodes
NAME         STATUS   ROLES                  AGE    VERSION
k8s-master   Ready    control-plane,master   3m     v1.32.3+k3s1
k8s-worker   Ready    <none>                 2m     v1.32.3+k3s1
You can confirm that the worker node has successfully joined the master node. Now the basic Kubernetes cluster setup is complete!
Comparing VirtualBox and VMware 🔄
Through this project, I was able to compare VirtualBox and VMware:
| Feature | VirtualBox | VMware |
|---|---|---|
| Network Configuration | Simple and intuitive | Complex and MAC address-based |
| Fixed IP Stability | Very reliable | May change after reboot |
| Vagrant Compatibility | Excellent | Some feature limitations |
| Performance | Somewhat slower | Faster |
| Shared Folders | Requires Guest Additions | Requires VMware Tools |
While VirtualBox is simpler and more stable for network configuration, VMware offers slightly better performance. However, when implementing IaC in on-premises environments, network stability is often more important than performance.
Conclusion: Implementing Stable On-Premises IaC with VirtualBox 🎯
After switching from VMware to VirtualBox, network-related issues were largely resolved, and I was able to build a stable on-premises Kubernetes environment. If I had used VirtualBox from the beginning, I would have saved a lot of time. 😅
Of course, VirtualBox also had minor issues like Guest Additions installation, but these were easily resolved by installing kernel headers and reinstalling. It was much simpler than VMware’s network configuration.
In the next post, I’ll explore how to install necessary components (Calico, cert-manager, Vault, etc.) on this k3s cluster. Stay tuned for more updates! 👋