
쿠버네티스에서 NFS와 MinIO로 고생한 이야기 🥲
안녕하세요, 개발자 여러분! 오늘은 쿠버네티스 환경에서 NFS와 MinIO를 설정하면서 겪었던 고난과 해결 과정을 공유하려고 합니다. 정말 말 그대로 피, 땀, 눈물이 있었던 하루였어요… 😭
🌱 왜 MinIO를 선택했나요?
객체 스토리지는 현대 클라우드 네이티브 애플리케이션에서 중요한 역할을 합니다. S3 같은 상용 서비스도 있지만, 온프레미스 환경에서는 자체 객체 스토리지 솔루션이 필요하죠.
MinIO를 선택한 이유는 다음과 같습니다:
- S3 호환성 💯 – AWS S3 API와 호환되어 애플리케이션 통합이 쉬움
- 쿠버네티스 친화적 🤗 – 쿠버네티스 환경에 최적화된 배포 방식 지원
- 가볍고 빠름 ⚡ – Go 언어로 작성되어 리소스 사용이 효율적
- 확장성 📈 – 테라바이트에서 엑사바이트까지 확장 가능
- 오픈소스 🔓 – 커뮤니티 지원과 무료 사용 가능
🚀 쿠버네티스 환경 구성
우리 환경은 다음과 같습니다:
- 호스트 머신: macOS (Mac Mini)
- 쿠버네티스 노드: Vagrant로 생성한 Ubuntu VM
- 스토리지 방식: NFS로 Mac에서 VM으로 디렉토리 공유
😱 문제 발생: “Protocol not supported”
MinIO를 설치하려고 했더니 다음과 같은 오류가 발생했습니다:
MountVolume.SetUp failed for volume "minio-pv" : mount failed: exit status 32
Mounting command: mount
Mounting arguments: -t nfs 192.168.100.2:/Users/kimvanye/Desktop/moolmeow/services/minio /var/lib/kubelet/pods/.../volumes/kubernetes.io~nfs/minio-pv
Output: mount.nfs: Protocol not supported
이 오류는 대체 뭘까요? 🤔
🔍 문제 원인 분석
몇 시간의 디버깅 끝에 다음과 같은 원인을 발견했습니다:
- NFS 클라이언트 문제: VM에 NFS 클라이언트가 제대로 설치되지 않음
- NFS 프로토콜 버전 문제: macOS는 기본적으로 NFSv3/v4를 지원하지만 호환성 문제 발생
- NFS 공유 설정 문제:
/etc/exports파일 설정이 잘못됨 - 권한 문제: UID/GID 매핑 설정이 필요함
🛠️ 문제 해결 과정
1. VM에서 NFS 클라이언트 설치 확인
sudo apt update
sudo apt install -y nfs-common
sudo modprobe nfs
sudo modprobe nfsd
2. NFS 마운트 테스트
VM에서 직접 NFS 마운트를 테스트해봤습니다:
sudo mkdir -p /mnt/services
sudo mount -t nfs -o vers=3,rw,soft 192.168.x.2:/Users/경로/services /mnt/services
이 명령어는 성공했습니다! 그렇다면 문제는 다른 곳에 있네요… 🧐
3. macOS에서 NFS 설정 수정
문제의 핵심은 /etc/exports 파일 설정이었습니다. macOS의 NFS 서버는 CIDR 표기법이 아닌 별도의 네트워크와 마스크 지정 방식을 사용해야 했습니다:
# 잘못된 방식 ❌
/Users/경로/services/minio -alldirs -mapall=501:20 192.168.x.0/24

# 올바른 방식 ✅
/Users/경로/services/minio -mapall=501:20 -network 192.168.x.0 -mask 255.255.255.0
각 디렉토리별로 설정을 추가했습니다:
# /etc/exports 파일 수정하기
sudo vi /etc/exports
파일에 다음 내용을 추가합니다:
# MoolMeow NFS 공유 설정
/Users/경로/services/jenkins -mapall=501:20 -network 192.168.x.0 -mask 255.255.255.0
/Users/경로/services/registry -mapall=501:20 -network 192.168.x.0 -mask 255.255.255.0
/Users/경로/services/minio -mapall=501:20 -network 192.168.x.0 -mask 255.255.255.0
/Users/경로/services/argocd -mapall=501:20 -network 192.168.x.0 -mask 255.255.255.0
/Users/경로/storage -mapall=501:20 -network 192.168.x.0 -mask 255.255.255.0
/Users/경로/shared -mapall=501:20 -network 192.168.x.0 -mask 255.255.255.0
/Users/경로/configs -mapall=501:20 -network 192.168.x.0 -mask 255.255.255.0
/Users/경로/k8s -mapall=501:20 -network 192.168.x.0 -mask 255.255.255.0
/Users/경로/databases -mapall=501:20 -network 192.168.x.0 -mask 255.255.255.0
/Users/경로/backups -mapall=501:20 -network 192.168.x.0 -mask 255.255.255.0
/Users/경로/logs -mapall=501:20 -network 192.168.x.0 -mask 255.255.255.0
파일을 저장한 후 NFS 서버를 재시작합니다:
sudo nfsd restart
이렇게 하면 /etc/exports 파일이 수정되고 NFS 설정이 적용됩니다. 여기서 주의할 점은 -mapall=501:20의 숫자는 macOS 사용자의 UID와 GID이므로 id 명령어로 본인의 값을 확인하여 적절히 변경해야 합니다.
### 4. 쿠버네티스 PV 생성

NFS가 제대로 설정되었으니 이제 PV를 생성합니다:

```bash
kubectl apply -f - <<EOF
apiVersion: v1
kind: PersistentVolume
metadata:
  name: minio-pv
spec:
  capacity:
    storage: 20Gi
  accessModes:
    - ReadWriteOnce
  persistentVolumeReclaimPolicy: Retain
  storageClassName: minio-nfs
  nfs:
    server: 192.168.x.2  # NFS 서버 IP 주소
    path: /Users/경로/services/minio
EOF
5. PVC 생성 및 MinIO 설치
kubectl apply -f - <<EOF
apiVersion: v1
kind: PersistentVolumeClaim
metadata:
  name: minio-pvc
  namespace: minio
spec:
  storageClassName: minio-nfs
  accessModes:
    - ReadWriteOnce
  resources:
    requests:
      storage: 20Gi
EOF

helm install minio minio/minio \
  --namespace minio \
  --set replicas=1 \
  --set mode=standalone \
  --set service.type=ClusterIP \
  --set persistence.enabled=true \
  --set persistence.existingClaim=minio-pvc \
  --set resources.requests.memory=256Mi \
  --set resources.requests.cpu=100m \
  --set ingress.enabled=true \
  --set ingress.host=minio.moolmeow.local \
  --set rootUser=minioadmin \
  --set rootPassword=minioadmin
🎉 드디어 성공!
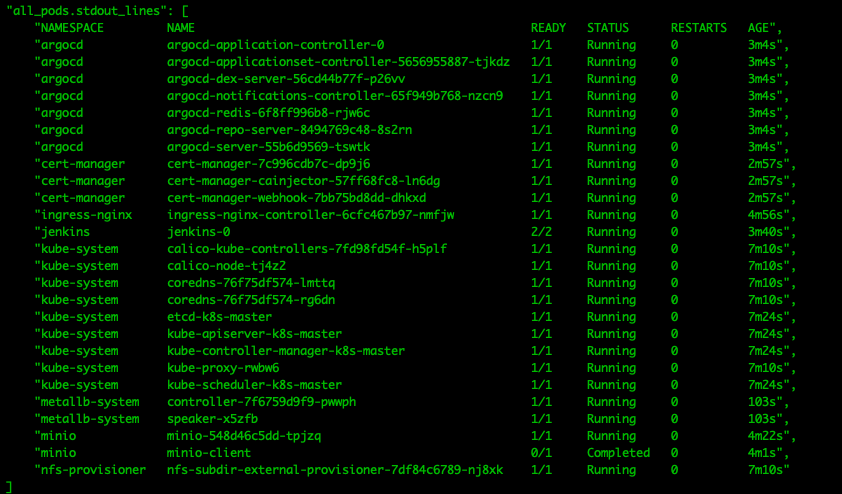
수많은 시도 끝에 드디어 MinIO 파드가 정상적으로 실행되었습니다:
kubectl get pods -n minio
NAME                    READY   STATUS    RESTARTS   AGE
minio-75d5b4d78-jx9p7   1/1     Running   0          2m
🧩 Helm 차트의 Values 개념
MinIO를 설치할 때 Helm 차트를 사용했는데, 여기서 --set 옵션으로 여러 값들을 설정했습니다. 이것이 바로 Helm의 Values 개념입니다! 😃
Values란 무엇인가요?
Helm 차트는 일종의 쿠버네티스 리소스 템플릿 모음이에요. 이 템플릿들에는 {{ .Values.xxx }} 형태의 변수들이 있고, 이 변수들의 실제 값을 우리가 설정해줄 수 있습니다.
예를 들어 MinIO 차트에서는:
# 이런 템플릿이 있고
service:
  type: {{ .Values.service.type }}

# 우리가 --set service.type=ClusterIP 로 설정
Values를 설정하는 방법
커맨드 라인에서
--set옵션 사용:helm install minio minio/minio --set key1=value1 --set key2=value2values.yaml 파일 사용:
# values.yaml 파일 생성
cat <<EOF > minio-values.yaml
replicas: 1
mode: standalone
persistence:
  enabled: true
  existingClaim: minio-pvc
ingress:
  enabled: true
  host: minio.example.com
EOF

# values.yaml 파일 적용
helm install minio minio/minio -f minio-values.yaml
values.yaml을 사용하는 이유
실제 프로덕션 환경에서는 --set 옵션보다 values.yaml 파일을 사용하는 것이 좋습니다:
- 가독성: 많은 설정을 관리하기 쉽습니다
- 버전 관리: Git 등으로 설정 변경 내역을 추적할 수 있습니다
- 환경별 분리: 개발, 스테이징, 프로덕션 환경별로 다른 values 파일을 사용할 수 있습니다
- 재사용성: 여러 배포에 같은 설정을 재사용할 수 있습니다
앞으로 이 프로젝트가 발전하면서 values.yaml 파일을 사용하여 더 체계적으로 MinIO와 다른 서비스들을 관리할 계획입니다. 이렇게 하면 환경별로 설정을 쉽게 변경하고 관리할 수 있을 거예요! 👍
🧠 교훈과 팁
- macOS NFS 설정은 Linux와 다릅니다 – CIDR 표기법이 아닌
-network와-mask를 사용해야 합니다. - UID/GID 매핑이 중요합니다 – macOS에서는
-mapall=UID:GID옵션으로 권한 매핑을 해야 합니다. - NFS 버전을 명시하세요 –
vers=3옵션을 사용하여 명시적으로 NFS 버전을 지정하는 것이 좋습니다. - 호스트 경로를 대안으로 고려하세요 – NFS가 계속 문제가 된다면 호스트 경로(hostPath)를 사용할 수도 있습니다.
- 단계별로 테스트하세요 – 쿠버네티스 설정 전에 VM에서 직접 마운트를 테스트하는 것이 도움이 됩니다.
📝 결론
NFS와 쿠버네티스는 강력한 조합이지만, 특히 macOS 환경에서는 생각보다 설정이 까다로울 수 있습니다. 이 글이 저와 같은 문제로 고생하시는 분들께 도움이 되었으면 좋겠습니다! 💪
혹시 궁금한 점이나 추가 팁이 있으시면 댓글로 남겨주세요. 함께 성장해요! 🌱
Battling NFS and MinIO in Kubernetes: A Survival Tale 🥲
Hello fellow developers! Today I’d like to share my adventure (or rather, misadventure) setting up NFS and MinIO in a Kubernetes environment. Let me tell you, there was blood, sweat, and tears involved… 😭
🌱 Why Choose MinIO?
Object storage plays a crucial role in modern cloud-native applications. While commercial services like S3 exist, on-premises environments often require self-hosted object storage solutions.
Here’s why I chose MinIO:
- S3 Compatibility 💯 – Compatible with AWS S3 API, making application integration seamless
- Kubernetes-Friendly 🤗 – Optimized deployment options for Kubernetes environments
- Lightweight & Fast ⚡ – Written in Go, efficient resource utilization
- Scalability 📈 – Scales from terabytes to exabytes
- Open Source 🔓 – Community support and free to use
🚀 Kubernetes Environment Setup
Our environment consists of:
- Host Machine: macOS (Mac Mini)
- Kubernetes Nodes: Ubuntu VM created with Vagrant
- Storage Method: NFS sharing directories from Mac to VM
😱 The Problem: “Protocol not supported”
When trying to install MinIO, I encountered this error:
MountVolume.SetUp failed for volume "minio-pv" : mount failed: exit status 32
Mounting command: mount
Mounting arguments: -t nfs 192.168.100.2:/Users/kimvanye/Desktop/moolmeow/services/minio /var/lib/kubelet/pods/.../volumes/kubernetes.io~nfs/minio-pv
Output: mount.nfs: Protocol not supported
What on earth does this mean? 🤔
🔍 Root Cause Analysis
After hours of debugging, I discovered several causes:
- NFS Client Issues: NFS client not properly installed on the VM
- NFS Protocol Version Issues: macOS supports NFSv3/v4 by default, but compatibility issues arose
- NFS Share Configuration Issues: Incorrect
/etc/exportsfile settings - Permission Issues: UID/GID mapping needed
🛠️ The Resolution Journey
1. Verifying NFS Client Installation on VM
sudo apt update
sudo apt install -y nfs-common
sudo modprobe nfs
sudo modprobe nfsd
2. Testing NFS Mounts Directly
I tested NFS mounts directly on the VM:
sudo mkdir -p /mnt/services
sudo mount -t nfs -o vers=3,rw,soft 192.168.x.2:/Users/path/services /mnt/services
This command succeeded! So the problem must be elsewhere… 🧐
3. Modifying NFS Settings on macOS
The core issue was in the /etc/exports file configuration. macOS NFS server requires a different syntax for network specification, not CIDR notation:
# Wrong way ❌
/Users/path/services/minio -alldirs -mapall=501:20 192.168.x.0/24

# Correct way ✅
/Users/path/services/minio -mapall=501:20 -network 192.168.x.0 -mask 255.255.255.0
I edited the /etc/exports file:
# Edit the /etc/exports file
sudo vi /etc/exports
Then I added the following content to the file:
# NFS share settings
/Users/path/services/jenkins -mapall=501:20 -network 192.168.x.0 -mask 255.255.255.0
/Users/path/services/registry -mapall=501:20 -network 192.168.x.0 -mask 255.255.255.0
/Users/path/services/minio -mapall=501:20 -network 192.168.x.0 -mask 255.255.255.0
/Users/path/services/argocd -mapall=501:20 -network 192.168.x.0 -mask 255.255.255.0
/Users/path/storage -mapall=501:20 -network 192.168.x.0 -mask 255.255.255.0
/Users/path/shared -mapall=501:20 -network 192.168.x.0 -mask 255.255.255.0
/Users/path/configs -mapall=501:20 -network 192.168.x.0 -mask 255.255.255.0
/Users/path/k8s -mapall=501:20 -network 192.168.x.0 -mask 255.255.255.0
/Users/path/databases -mapall=501:20 -network 192.168.x.0 -mask 255.255.255.0
/Users/path/backups -mapall=501:20 -network 192.168.x.0 -mask 255.255.255.0
/Users/path/logs -mapall=501:20 -network 192.168.x.0 -mask 255.255.255.0
After saving the file, I restarted the NFS server:
sudo nfsd restart
Note that the -mapall=501:20 values refer to macOS user UID and GID. You should check your own values using the id command and adjust accordingly.
### 4. Creating Kubernetes PV

Now that NFS was properly configured, I created the PV:

```bash
kubectl apply -f - <<EOF
apiVersion: v1
kind: PersistentVolume
metadata:
  name: minio-pv
spec:
  capacity:
    storage: 20Gi
  accessModes:
    - ReadWriteOnce
  persistentVolumeReclaimPolicy: Retain
  storageClassName: minio-nfs
  nfs:
    server: 192.168.x.2  # NFS server IP address
    path: /Users/path/services/minio
EOF
5. Creating PVC and Installing MinIO
kubectl apply -f - <<EOF
apiVersion: v1
kind: PersistentVolumeClaim
metadata:
  name: minio-pvc
  namespace: minio
spec:
  storageClassName: minio-nfs
  accessModes:
    - ReadWriteOnce
  resources:
    requests:
      storage: 20Gi
EOF

helm install minio minio/minio \
  --namespace minio \
  --set replicas=1 \
  --set mode=standalone \
  --set service.type=ClusterIP \
  --set persistence.enabled=true \
  --set persistence.existingClaim=minio-pvc \
  --set resources.requests.memory=256Mi \
  --set resources.requests.cpu=100m \
  --set ingress.enabled=true \
  --set ingress.host=minio.moolmeow.local \
  --set rootUser=minioadmin \
  --set rootPassword=minioadmin
🎉 Success at Last!
After numerous attempts, the MinIO pod finally started running normally:
kubectl get pods -n minio
NAME                    READY   STATUS    RESTARTS   AGE
minio-75d5b4d78-jx9p7   1/1     Running   0          2m
🧩 Understanding Helm Chart Values
When installing MinIO, we used a Helm chart with several --set options. This is where the concept of Helm Values comes into play! 😃
What are Values?
Helm charts are essentially collections of Kubernetes resource templates. These templates contain variables in the form of {{ .Values.xxx }}, and we can provide actual values for these variables.
For example, in the MinIO chart:
# Template has something like this
service:
  type: {{ .Values.service.type }}

# And we set it with --set service.type=ClusterIP
How to Set Values
Using the
--setoption on the command line:helm install minio minio/minio --set key1=value1 --set key2=value2Using a values.yaml file:
# Create a values.yaml file
cat <<EOF > minio-values.yaml
replicas: 1
mode: standalone
persistence:
  enabled: true
  existingClaim: minio-pvc
ingress:
  enabled: true
  host: minio.example.com
EOF

# Apply the values.yaml file
helm install minio minio/minio -f minio-values.yaml
Why Use values.yaml?
In production environments, using a values.yaml file is preferred over --set options:
- Readability: Easier to manage many configurations
- Version Control: Track configuration changes with Git
- Environment Separation: Use different values files for dev, staging, production
- Reusability: Reuse the same configurations across deployments
As this project evolves, we plan to use values.yaml files to manage MinIO and other services more systematically. This will make it easier to change and manage configurations for different environments! 👍
🧠 Lessons and Tips
- macOS NFS Configuration Differs from Linux – Use
-networkand-maskinstead of CIDR notation. - UID/GID Mapping is Crucial – Use the
-mapall=UID:GIDoption for permission mapping on macOS. - Specify NFS Version – It’s best to explicitly specify the NFS version with the
vers=3option. - Consider Host Path as an Alternative – If NFS continues to be problematic, hostPath is an option.
- Test Step by Step – Test mounting directly on the VM before Kubernetes configuration.
📝 Conclusion
NFS and Kubernetes make a powerful combination, but configuration can be trickier than expected, especially in a macOS environment. I hope this post helps others who face similar issues! 💪
If you have any questions or additional tips, please leave them in the comments. Let’s grow together! 🌱